¶ How to create your own events/soundbanks
¶ Required Tools
- Wwise2022.1.3 Program to create or edit Sound banks for games
- Audacity Audio Editor
- BNK Extract Program to extract.bnk files
- Visual Studio Code Feature rich tool to read, create or edit code
- Notepad++ Simple program to read, create or edit code
¶ Tutorial
¶ Adding the .wav files to Wwise2022.1.3
First, drag your .wav audio files into Actor-Mixer Hierarchy > Default Work Unit*, then click Import.
Make sure all sounds are set to Sound SFX. and the Audio Tab is open shown on the left side.
¶ Creating the Events
Then, select all the SFX that you've dragged in, right-click, hover over New Event (One Event per Object), and select Play.
Next, go to the Events tab to check if the events for each audio have been created.
.gif)
¶ Creating the Soundbanks for both Audio and Events
Then, go to the SoundBanks tab, right-click on Default Work Unit*, hover over New Child, and select Soundbank.
Name the first soundbank something like champion_sfx_audio for the audio soundbank.
After creating the first soundbank, copy and paste it, then rename the copy to something like champion_sfx_events for the events soundbank.
Now press F7 to open the Soundbank Manager in the middle, where you can see the two soundbanks inside.
¶ Adding the audios and the events to the soundbanks
Audio SoundBank:
In the SoundBanks Manager, select champion_sfx_audio. You'll notice that the Hierarchy Inclusion is empty.
While champion_sfx_audio is still selected in the SoundBank Manager, go to the Audio Tab and select all the audios that you've uploaded.
Add them to the champion_sfx_audio's hierarchy inclusion.
Then, select all of them and uncheck both Events and Structures and leave Media checked.
ㅤ
ㅤ
ㅤ
Events SoundBank:
For the events, the process is the same as adding the audios to the champion_sfx_audio, but for this one, you’ll want to drag both the audios and events into the champion_sfx_events' hierarchy inclusion.
In the SoundBanks Manager, select champion_sfx_events. You'll notice that the Hierarchy Inclusion is empty.
While champion_sfx_events is still selected in the SoundBank Manager, go to the Audio Tab and select all the audios that you've uploaded.
Add them to the champion_sfx_events' hierarchy inclusion.
Now, go to the Events tab, select all the events you've created, and add them to the champion_sfx_events' hierarchy inclusion.
Then, select all of them and uncheck only the Media.
¶ Generating the audio and events soundbank files
Lastly, once you're ready, select both of your soundbanks, champion_sfx_audio and champion_sfx_events, and click Generate All. A window will pop up, and once it's done generating, you can click Close.
After returning to the SoundBank Manager, right-click on any of your soundbanks, hover over Open Containing Folder, and select the .bnk file.
This will open the folder, and you'll see your custom soundbank files.
Now, it's time to add it to your custom skin.
¶ Additional Tips
¶ Adjusting Speaker Panning / 3D Spatialzation
Before we generate the audio and events soundbanks, let's first adjust the 3D spatialization of the audio so it won't be heard across the entire Summoner's Rift.
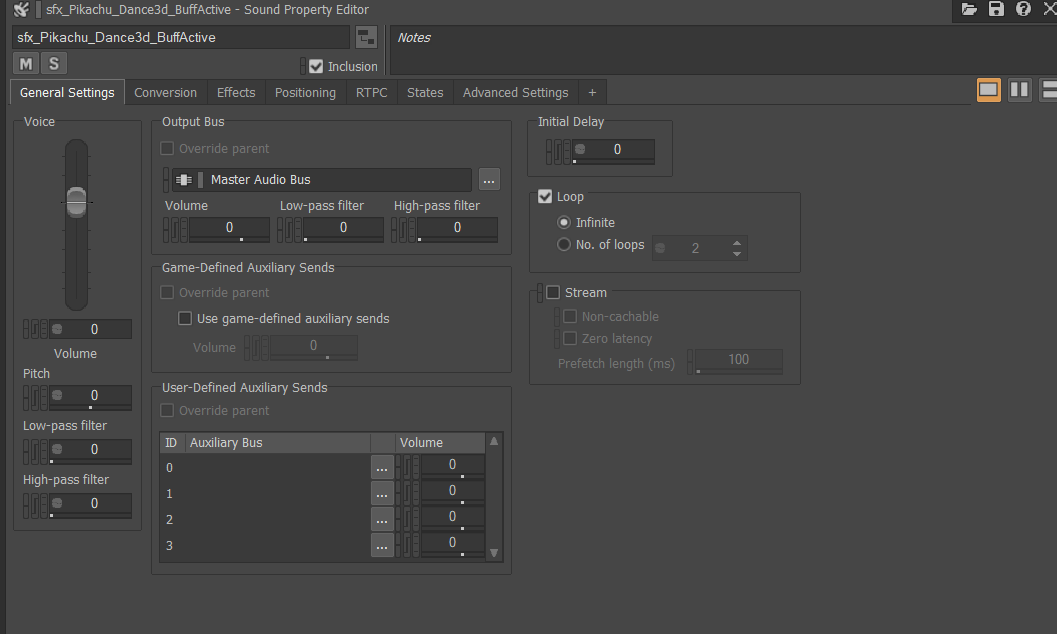
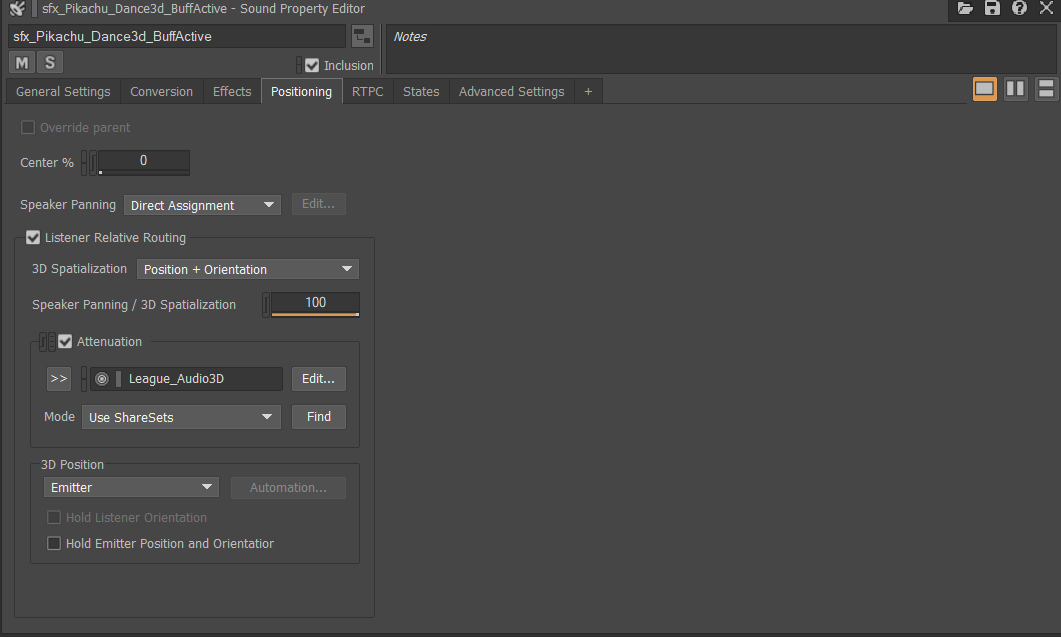
First, open the Audio Tab and select one of your audio files to edit. Once selected, open the Sound Property Editor by pressing F5, and this window will appear.
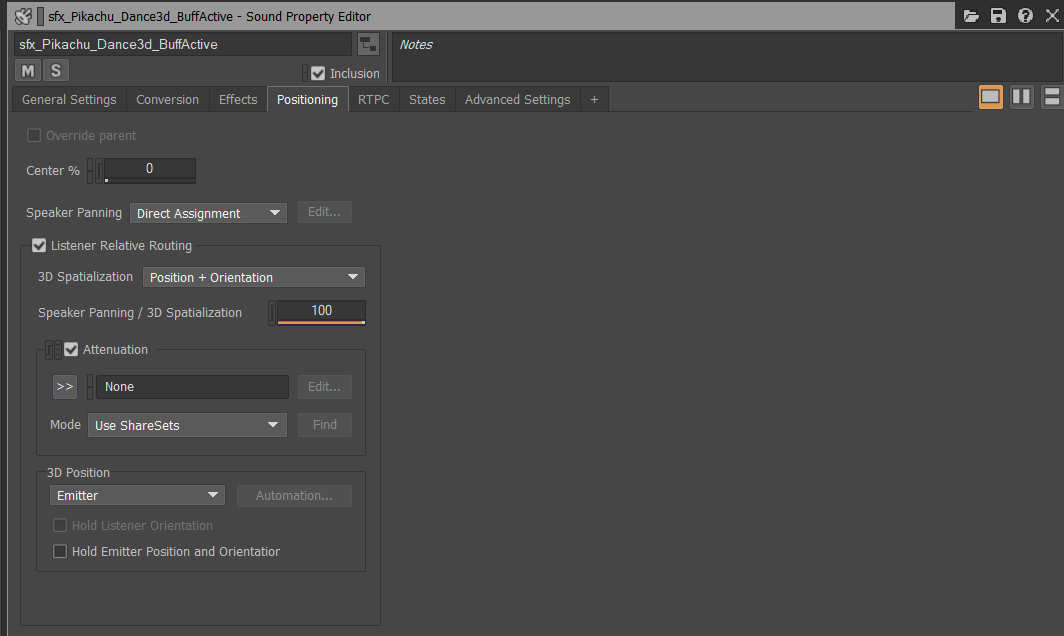
Next, switch tab from the General Settings tab to Positioning, and you'll see this. What you want to do is enable Listener Relative Routing, set 3D Spatialization to Position + Orientation, and then check Attenuation.
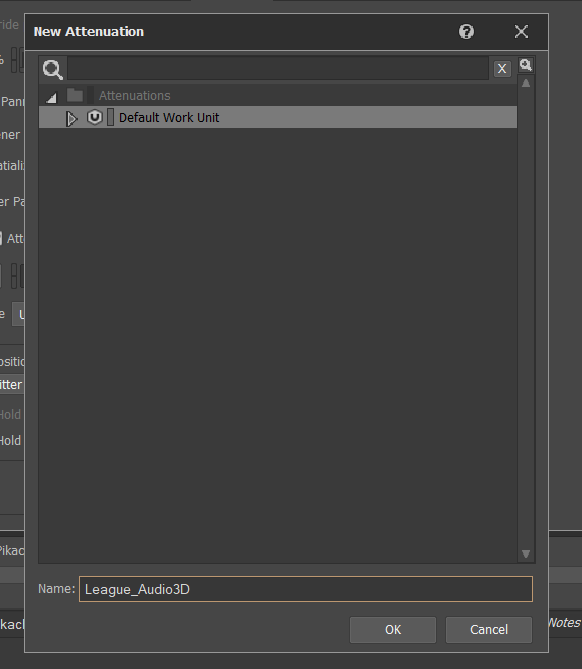
Now you would want to click that double arrow and press New...
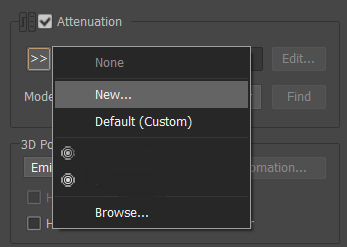
The New Attenuation window will pop up. We want to create our own so we don’t have to repeat this step for the others. Name it something like League_Audio3D, and then click OK.
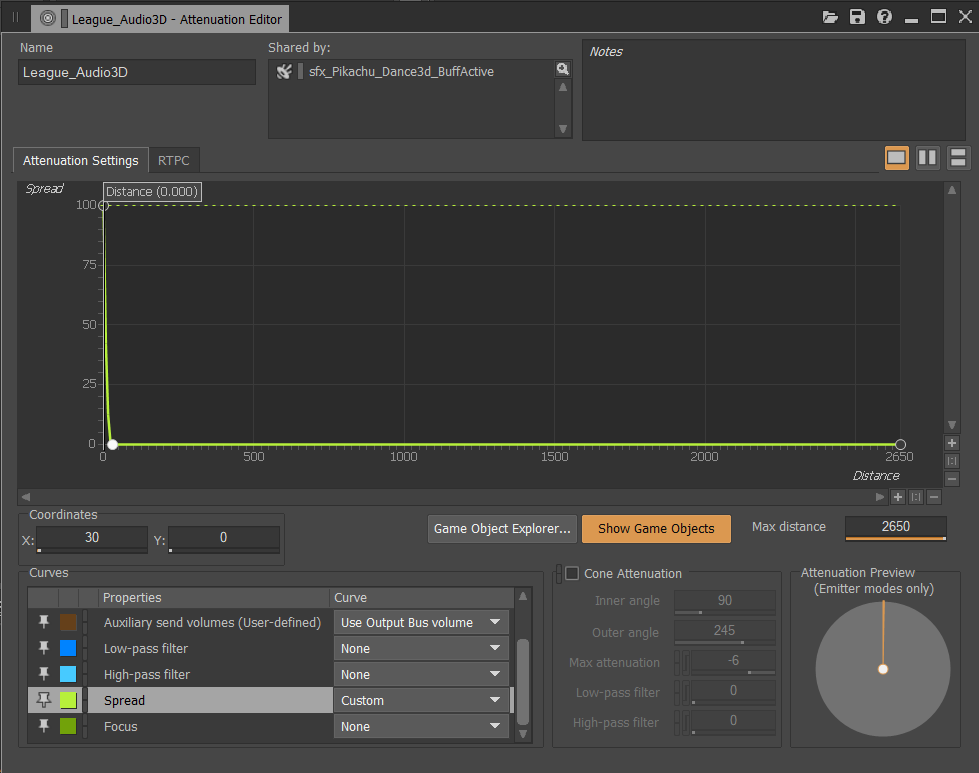
Now, once you've created the Attenuation, click Edit....

Now that the Attenuation Editor has opened, go to Properties and scroll down until you see Focus. Click the dropdown for Focus and select Custom. You will then see only the green line graph.
Next, set the Max Distance to 2650 (from 100), and double-click the middle of the graph to create a dot.
Set the coordinates of the middle dot to X: 30, Y: 0.
Lastly, select the other dot located at Y: 100. Right-click on it and select Logarithmic (Base 3).
After doing this, your graph should look like the screenshot below, and you can exit the window.
After setting up the Attenuation, your Positioning should look like this. Now, repeat these steps for your other audio files. Don't worry—the Attenuation you just created and edited is saved, so you can use it again without needing to recreate the graphs for each.
Once you're done with all of that, you can go back and generate your soundbanks!
¶ Sources
- Nyht