Page is still in the works, for further help ask in the discord
-Gatrix
¶ Required Tools
¶ Introduction to UVs
The concept of UVs is quite simple.
A UV consists of every face of a mesh unfolded onto a square plane. The position of the face on this plane determines what part of the texture file gets applied to it.
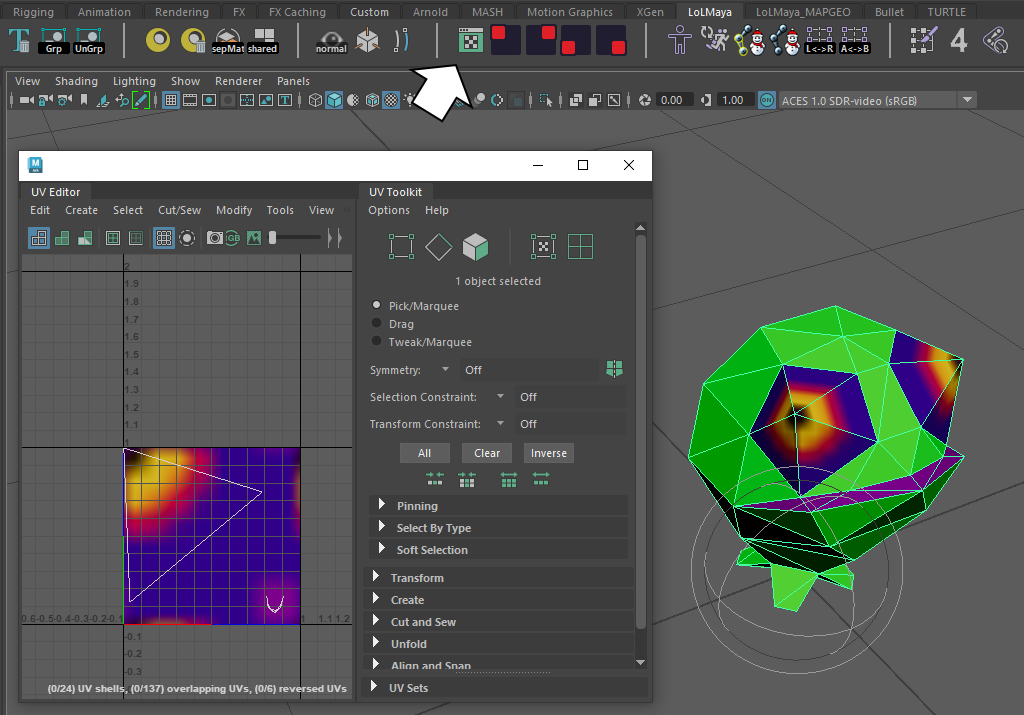
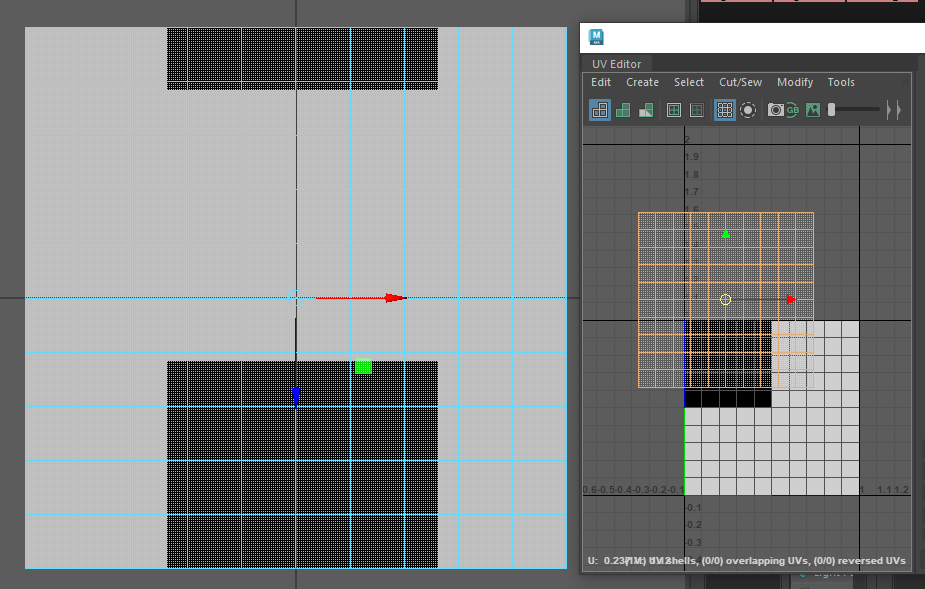
To view UVs, select a mesh and then open the UV Editor via the button in LoLMaya.
¶ Importing and applying textures in Maya via Hypershade
¶ Importing files
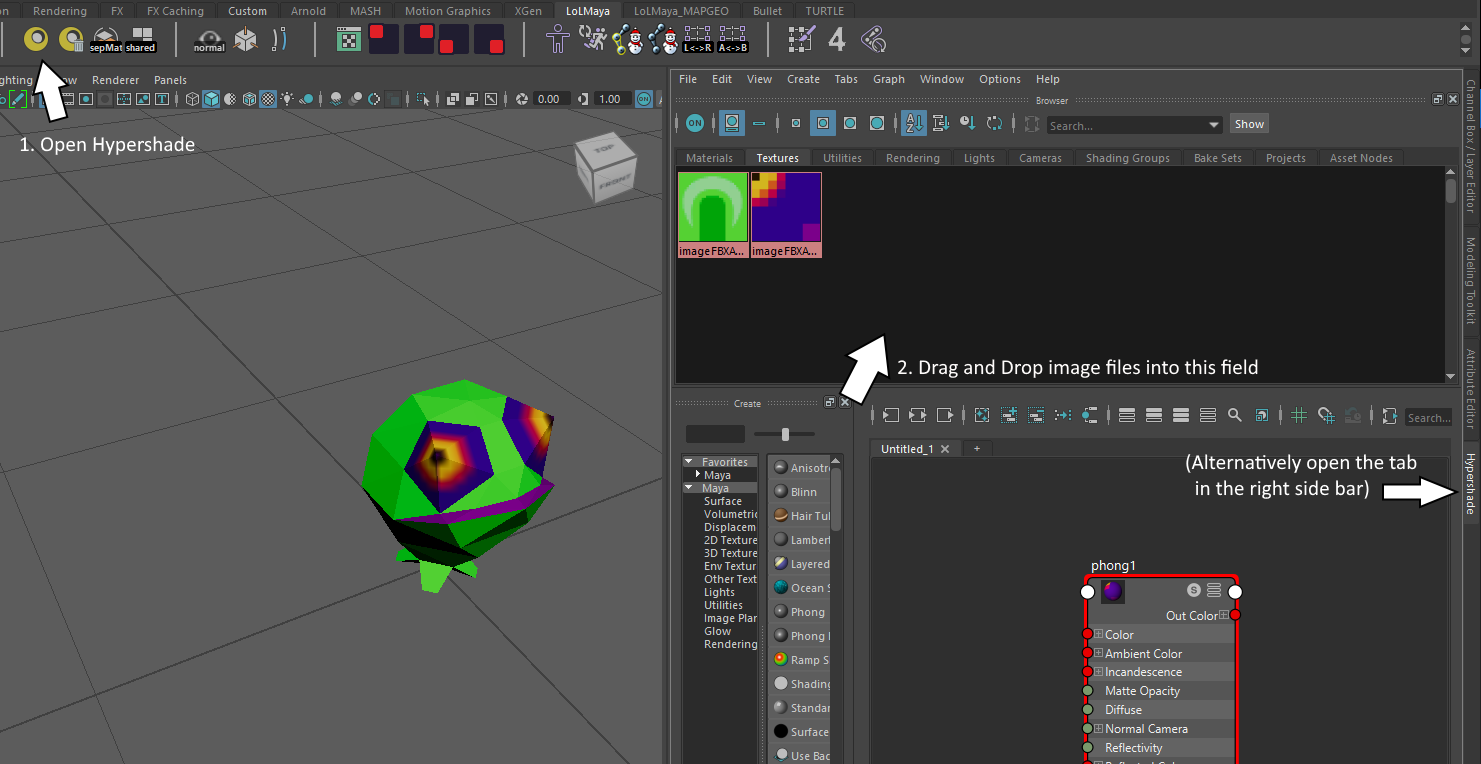
You can use Hypershade to import any image file as a texture into Maya.
Keep in mind that image files that aren't square will be stretched to fit.
To do this you have to open Hypershade and then drag & drop an image file into the file space of the "Textures" tab.
¶ Applying imported textures to a mesh
To apply a texture to a mesh, you simply have to select that mesh in your scene or Outliner and then hold right-click on the texture you want to apply. In the options that appear now, select "Apply Texture's Material to Mesh" and your mesh will have the texture applied to it, for better or worse.
¶ Fixing transparent textures
Your model may look weirdly transparent, but this is rather easy to fix.
Select the part of the mesh that has the transparancy, then open the Attribute Editor via the button in the top right corner or the tab on the right edge.
In the Attribute Editor itself there will be tabs listing various properties of the mesh, but you'll only need the texture(s), which are towards the right end of the tab list.
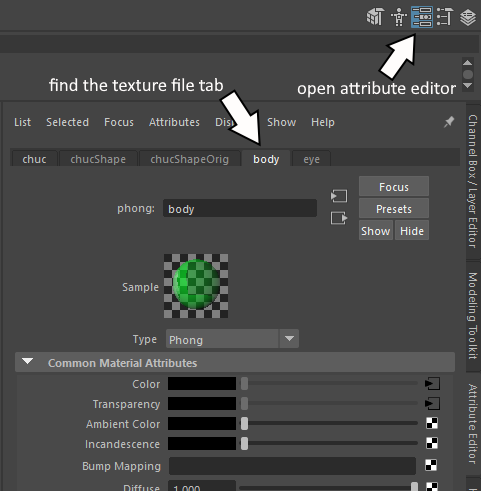
In there, you right click on the word "Transparency", then click "Break connection" and your mesh should look rock solid again.
¶ UVs outside the 0-1 bounding box
Normally all UV faces will be inside the 0-1 space of the UV plane, since this also is where the texture file will be applied.
Sometimes they will be outside of this bounding box though, but this only becomes a problem when you have to combine UVs, which I'll cover later.
The way Maya deals with this is by "infinitely repeating" the texture file in all directions.
¶ UV editing toolbox
When editing UVs, you'll have to switch to Face Selection Mode (F11) to select parts of the UVs and edit them.
There's lots of Maya-native UV editing tools available directly in the UV Editor, but you'll want to use those provided by LoLMaya almost exclusively (at least when you work with 3D models you've downloaded).
You will need the Maya-native tools when you create your own 3D model and UV, which wont be covered in this guide (for now).
I'll explain specific applications of these tools later on.
¶ LoLMaya interface
On the right of the UV-Editor button there are four buttons which look like this (insert picture of buttons).
Those buttons will, when clicked, make all selected UV faces half their current size and move them to a corner quadrant. (insert example picture)
I think it should be pretty obvious which button moves it to which corner.
You can also use these multiple times to move them in smaller quadrants, which looks something like this (insert picture - 1. Moved to top right corner -> 2. Moved to bottom right corner (should be lower right of top right corner))
¶ Maya-native Tools
¶ Gather Shells
Gather Shells tries to place all shells that are outside the 0-1 boundary inside it.
It's always good to just start off the UV editing process by selecting all of the UV and then gathering shells, since sometimes the UVs can be very weird and placed at 2-3 instead of 0-1. (insert example picture(s))
When they are placed on the edge of the 0-1 UV space, they wont get put inside it completely, since that would change the part of the texture that gets applied to it.
I'll go over how to fix this in the "Fixing weird UVs" section
¶ UV sets
(can make the UV set disappear if you combine two meshes with different uv set name)
¶ Other Tools
I'll add other Maya-native tools here once I learn how to use them.
¶ Use cases in custom skins
List of possible use cases I'll be covering in this guide.
- Combining downloaded texture files into a single file
- Fixing weird UVs
¶ Specific examples
¶ Combining downloaded texture files into a single file
This will most likely be useful if you're following the guide for replacing champions with a different model, which doesn't go into detail about how to get textures to work, but that's what this guide is for.
Since both guides tell you to edit the mesh you've downloaded, it is important to note that editing the UV should ALWAYS happen before binding the skin to the skeleton.
¶ Sorting files
A champ's base texture file will be a single (or sometimes 2) square .dds file, the 2x and 4x files are the lower resolution ones. You can delete the 2x/4x ones and only replace the base one, which will also replace the lower resolution ones (they just wont be low res). (insert picture of champ's base\assets folder)
When you've downloaded a 3D model and unzip'd the .zip or .rar (or whatever file format it comes in), the extracted folder should look something like this
(insert picture of folder with textures, .fbx/.gltf, other subfolders, unneccessary files)
The only files you'll need will be texture files and the 3d model or Maya/Blender scene. There may be textures which are duplicate or have weird colour schemes
You can delete all the files that don't look like a texture for the model (or just ignore them).
¶ Setting up your Maya scene
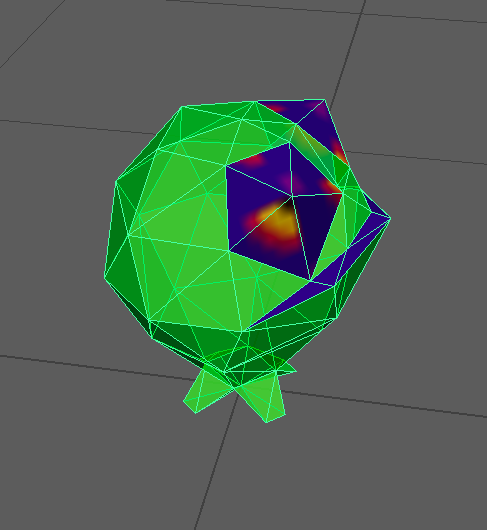
After importing the model and all texture files, you now should have multiple meshes listed in your Outliner,the first step is figuring out what texture files belong to which part of the mesh. This is pretty easy to do just by trial-and-erroring, since it is very obvious if a texture fits a part of the mesh once you apply it (insert picture of fitting and non-fitting texture applied to a part of a mesh).
After you applied all textures to your mesh you can now delete all unused nodes in Hypershade, which will leave you with all texture files you want to combine into the champ's base texture file.
¶ Combining the mesh
Now you can start combining the parts of the mesh that use the same texture file.
If you're lucky, the UVs will look something like this when looked at together (insert picture of good UV)
If that's the case, you can just combine those parts of the mesh, and continue to do so until you've done this for every texture file.
If you're not lucky, it will look something like this, with parts of the UV being stacked on top of each other or being outside of the 0-1 boundary.
(insert pictures of bad UVs, both single parts and multiple parts)
If that's the case, you'll want to read the chapter below this, "Fixing weird UVs".
Once you have combined all parts of the mesh that use the same texture file, you'll also want to combine those bigger parts of the mesh, until you are only left with a single mesh.
Depending on the number of mesh parts (optimal is 4 or less) you can simply select their UVs and move them to different corners with the LoLMaya commands (insert picture showing stacked UVs -> UVs moved to corner)
If you have more than 4 mesh parts, you'll have to split one or more quadrants of your UV into more quadrants, which comes down to using the LoLMaya commands multiple times.
¶ Combining the texture files
After you've moved the UVs so that looking at the combined UV of all mesh parts doesn't make any of them overlap or be outside the 0-1 UV boundary, you're ready to combine the texture files!
You can now open one of the texture files your mesh uses in paint.net, and then use the "Canvas Size" tool under "Image" to expand the canvas to double its current size, so if the texture file is 256x256 pixels, you should expand the canvas to 512x512.
Remember to anchor the texture file to one of the corner before doing so though, preferrably the corner it inhabits in the UV.
Now you just have to import all other texture files, put them in their assigned corners and save the image!
Remember to save it as a .dds with "BC3, Linear DXT5" (paint.net will default to "BC1, Linear DXT1").
This single file is what you'll replace the champ's original .dds texture with.
You can now continue following the guide for replacing champions with a different model.
¶ Fixing weird UVs
-
UVs outside 0-1 boundary
-
Stacked UVs (same texture file)
-
"Line" UVs